 |
||
In this tutorial, tools accessed in your Tool Palette are in red text. Effects found in the Menu Bar are followed by bracketed Keyboard Shortcuts denoted by blue text. |
||
| Open a 24 Bit, 500 X 500 pixel image with a black background. | ||
|
Set both the foreground and background colors in your color palette to #FEB14E. On a new layer (Layer 1), draw the basic shape of your flame with the Freehand Line tool. (Image 1) |
 |
|
| Duplicate this layer twice. Rename the new layers Layer 2 and Layer 3 (Layer 3 on top). | ||
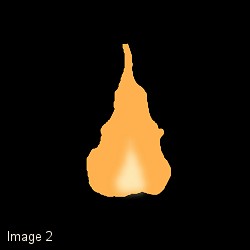
| Select Layer 3. Use the Color Replacer tool to change the color to a light yellow, #FEE8B4 or something similar. Resize [Shift + S] the layer at a scale of around 35%. (In the Resize dialogue box, be sure that "All Layers" is unchecked and that "Maintain Aspect Ratio" is checked.) Using the Mover tool, relocate the image to line up with the bottoms of the images on the other layers. Apply a Gaussian Blur [Alt + T, B, G] with a radius of 8. (Image 2) |
 |
|
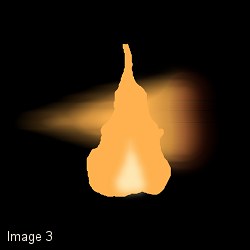
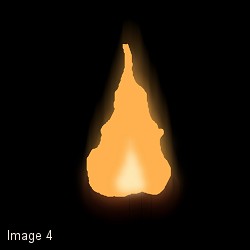
| Select Layer 1. Apply a Gaussian Blur [Alt + T, B, G] with a radius of 15. Rotate [Ctrl + R] the layer left 90 degrees. (Be sure that "All Layers" is unchecked.) Apply a Geometric Wind effect [Alt + T, G, W] with a strength of 20, from the right. (Image 3) Rotate [Ctrl + R] the layer back to the right 90 degrees and use the Mover tool to line up the flame with the other layers. (Image 4) |
  |
|
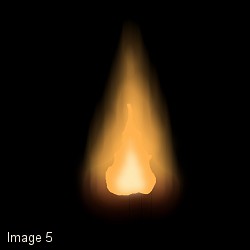
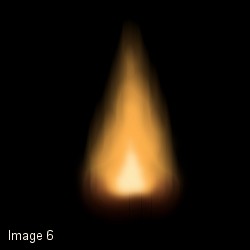
| Select Layer 2. Resize [Shift + S] to 60% ("All Layers" unchecked) and use the Mover tool to realign the image. (Image 5) Apply a Gaussian Blur [Alt + T, B, G] with a radius of 8. (Image 6) |
  |
|
| You now have the basic elements of your flame, so I suggest saving the file as a master at this point using the PSP format in order to retain the layer information.
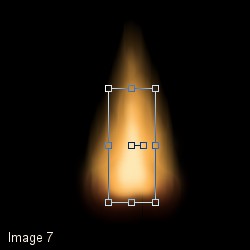
This is a good point to experiment with fine tuning your image. For variation, you can try playing around with the individual layers at this point by adjusting the histogram, the HSL settings, or adding uniform noise. As shown in Image 7, I've used the Deformation tool on Layer 3 to fill the flame out with the lighter color. |
 |
|
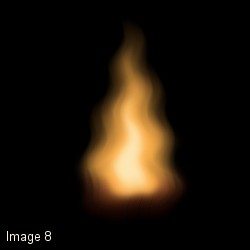
| In the layer palette, turn off the background visibility by clicking on the Layer Visibility Toggle (eyeglasses icon). Now right-click on the title of any of the visible layers and merge layers 1, 2 and 3. Apply a Geometric Wave [Alt + T, G, V] effect to the merged layer with the horizontal displacement values set at a wavelength of 100 and an amplitude of 4-8. Both vertical displacement values should be 0. (Image 8) |
 |
|
| The image can now be deformed to your taste to create a variety of flames. (Image 9) The deformation tool, additional wave effects, and resizing will enable you to create a veritable conflagration! | 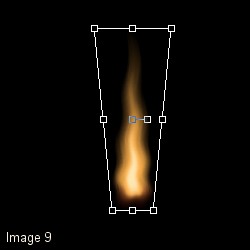 |
|
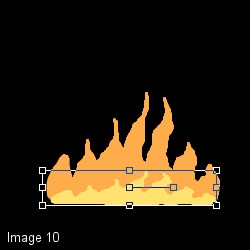
| This process used to create a single flame can also produce a complete fire. Start by drawing multiple flames. The one process you'll want to do differently is resizing Layers 2 and 3 (Steps 4 and 6 above). Instead of using the Resize dialogue, use the Deformation tool. This will allow you to reduce the height with little change to the width. (Image 10) This image may need more work than the single flame to obtain a good appearance. Adding uniform noise at around 5% will add some texture. Enhancing edges with a slight Gaussian Blur can better define a layer. Once you've merged your layers, some sharpening will bring out detail. |
 |
|
| Send an email with any questions or comments. |
||